My Brush Story
If you follow me on instagram you know how long this first segment has been in the works. Originally I assumed I would get a few neat stories and maybe a picture or two in response to my post (see here) - but I was blown away by the multitude of thoughtful, heartfelt stories - and I’m still receiving them! I couldn’t simply do one small post and capture the depth, breadth and journey of paintbrush experiences.
So I’m introducing the first of a monthly series: My Brush Stories. Each month I’ll pull a few stories from the collection I’ve been assembling and share them on my blog here, my instagram and other media (still in the works, more information soon!).
So without further ado, here is the first of what I hope will be an exploration into other artist’s practices, their work and how it’s made - starting with our favorite tools.
(To submit yours, head over to the My Brush Story page!)
Katrin Bauck | @katrinbauck
At first glance, there's nothing special about my favorite brush - it's a usual bristle brush, natural wooden handle (light brown), which I think I have bought for my son's school equipment years ago.
When I started painting in 2016 I tried out every brush I could find in our house so also this one went into my toolbox. :-) Immediately I fell in love with the shape and softness of the handle, the broadness of the bristles and their wildness.
In summer 2017 I took a small selection of brushes with me to our family vacation trip to the Baltic Sea, including that brush. After days of lovely laziness, long walks at the beach, collecting shells and stones and taking countless pictures, one afternoon back “home” at the lovely Danish cottage I took out my brushes and was stunned by their beauty, especially by this one’s paint splattered handle.
Inspired, I googled for a lovely quote on brushes and found this one, which is still one of my favorites, by Henry Ward Beecher:
“Every artist dips his brush in his own soul, and paints his own nature into his pictures.”
I wrote it into my sketchbook and took two pictures, one with the quote and the brush and one just a close-up of the handle (see both attached). And somehow then, in the soft afternoon light in the Danish cottage, I connected that lovely slow summer feeling and that quote with this brush and whenever I hold it now, it inspires me to slow down, to watch for the beauty and when I paint, to dip my brushes in my soul. :-)
Katrin Bauck
Katrin Bauck
Julia Cusworth | @juliacusworth
I have had this thick, flat brush for about 5 years. Once I decided to start pursuing art in my spare time, I delved back into my old supplies from college and university but found myself lacking in the brush department. I ordered a pack of iconic yellow Daler Rowleys and although I love them all, this is my favourite. It creates the most beautiful thick, fat strokes; stripes, swirls and ink splatters. It is bold and obvious - much like my art. It is the brush I reach for first and the one I know I could never replace. It helps guide my work when I don't know where to go next and it understands me. Not breaking or giving up when I don't always wash out the ink or glue but instead developing it's own unique texture, making it even more personal to me.
Julia Cusworth
Julia Cusworth
Sabrina Cottrill | @sabrina.cottrill.art
My brushes are definitely not fancy or expensive and yet I realized a large chunk of my brushes have been with me a really long time. To some of the first ones I purchased back in high school for my first painting class. (Hello early 2000s) To then my college art days picking some up here and there when I could afford. Eyeing up the clearance ones working part time at an art store. They've moved from home to home and I got used to being a new mom and have finally found their way up from the basement and into my studio.
Sabrina Cottrill
There is just something so magical about seeing into other artist's creative worlds.
Thanks to everyone for sharing the stories thus far, I am so looking forward to sharing more next month in Volume 2.
Have a favorite brush you want to share? Tell me about it in the comments, use the hashtag over on instagram or head over to the page and submit there . Can't wait to read them!
<3
Materials List on Amazon
I love talking art materials.
I love seeing into other artist’s bags of tricks, learning about their tools and wondering if it’s something I want to play with, something that might benefit my practice, or something I get to just be in awe of! (I'm looking at you ceramicists!) The number one question I get asked by other artists is; “Where did you find that brush/squeegee/paint color/staple gun/apron (etc)”!!!?? So I think there might be a few people out there who feel the same way I do.
I try to compile as much information on the request as I can, “where I found it, how it works, how it doesn’t work, how much is usually is….” but that can take AWHILE and I’ve been known to forget details.
Which is why I was very happy to be asked to participate in the Amazon Influencer program - providing me with a direct portal for those questions.
Instead of hunting down links, trying to remember color names or prices - I can direct these questions to my shop page where everything I use is plainly laid out and available for purchase. I usually try out new materials each time we head off on a trip, so this will be where I list those purchases as well.
There’s no additional fee to order via my shop, everything is the same price as you’d find elsewhere on Amazon - but I do get a small percentage back. Which as a full-time artist is very appreciated.
I understand those sort of situations can feel a little weird, so I absolutely wouldn’t fault anyone who wanted to find the products on their own. I choose to participate in these sorts of services as every little bit helps keep my practice going, keeps me available to answer questions, lets me work on tutorials and articles and generally just keeps this ship afloat.
Let me know if you want to see something in particular or want me to answer any questions about a specific material.
While we’re on the materials tangent, I wanted to talk a little bit about a project I started a few weeks ago that has taken on another life entirely! I started a little hashtag called #mybrushstory, (because I LOVE seeing what other artists use!) and asked for email submissions detailing the stories behind the brushes we use. Originally I had planned on using 2 - 3 entries for a little blogpost on the subject, but I was blown away by the incredible stories shared. One small post won’t do these artists and their brushes justice, so I’m trying to reimagine the project, perhaps into a series of sorts.
If you want to submit to the series, hop on over to this page for more information!
Wishing you all a wonderful day <3
On Thinning Acrylics
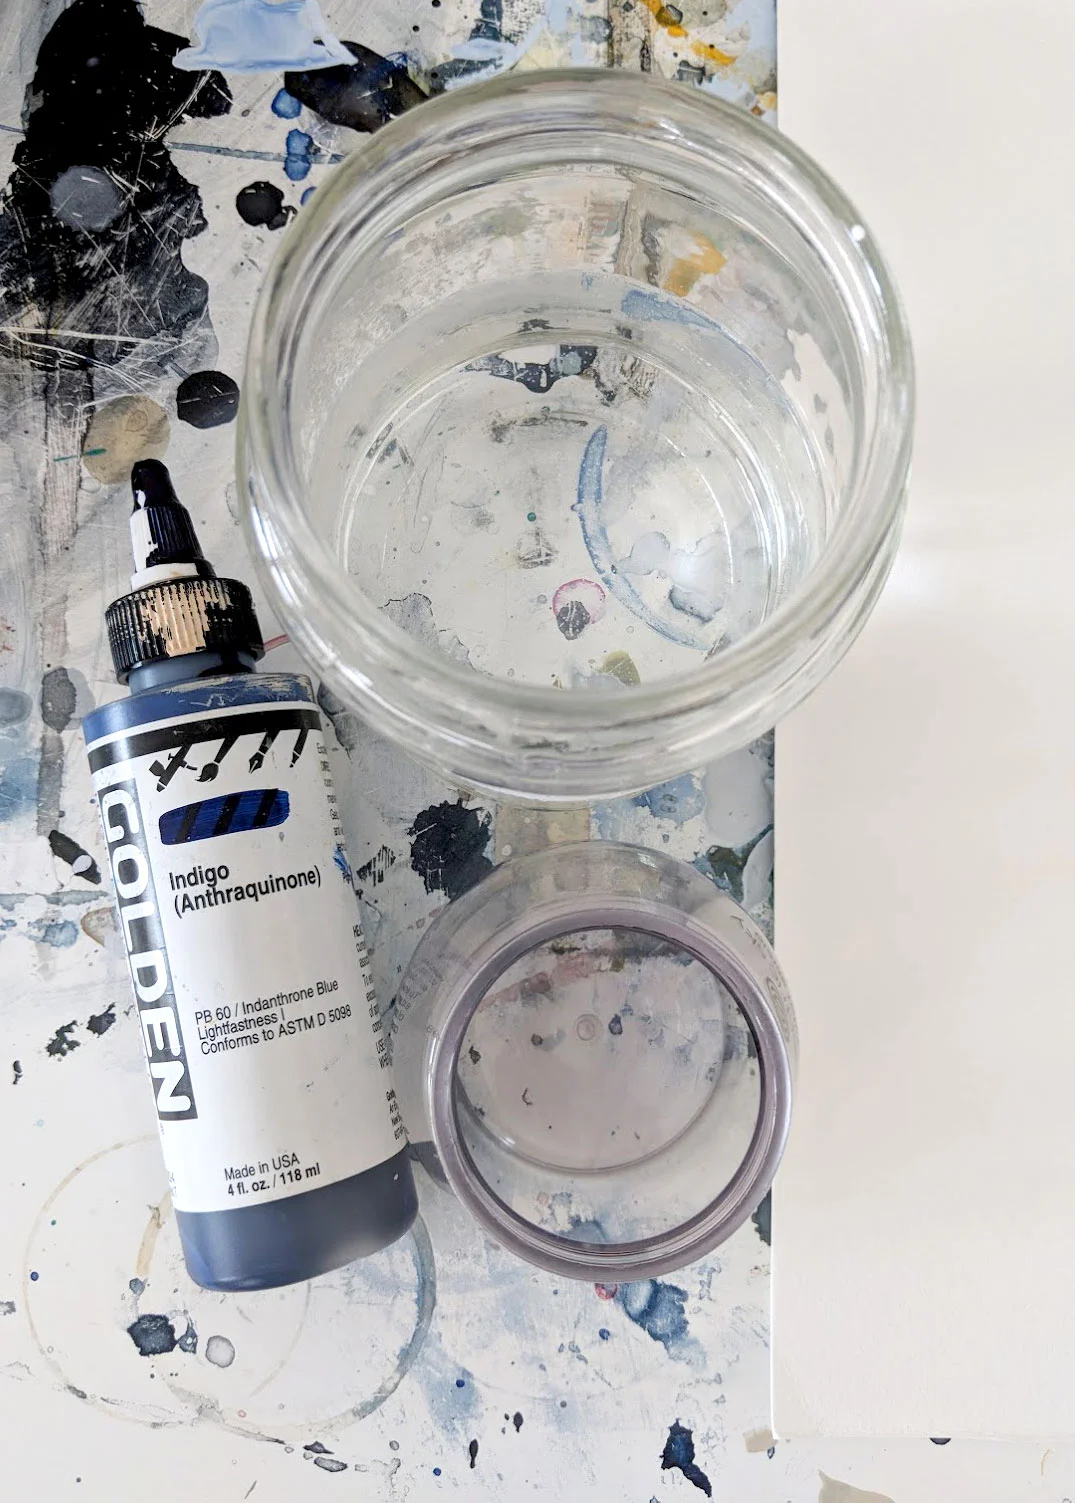
I receive a lot of questions regarding the types of paint I use in my work. It’s not outwardly apparent in most cases (which is what I strive for; I want my work to be about the colors and rhythm and not it’s materiality), so thought I’d put together a little information on how to make and use thinned acrylics like mine.
What I’m searching for is pigment without texture, color made from layering pigment, and preserving the natural randomness of water.
I began with watercolors, building washes and layering on paper, but when I started to expand the dimensions of my paintings and wanted to work with ever-so-slightly more opaque paints I switched to thinned acrylics.
I know there are a number of other ways to approach this technique - I’m just going to detail mine here. If you have another method, please feel free to share with us in the comments!
Washes vs. Glazes
Brands Used:
Golden Acrylics
Liquitex
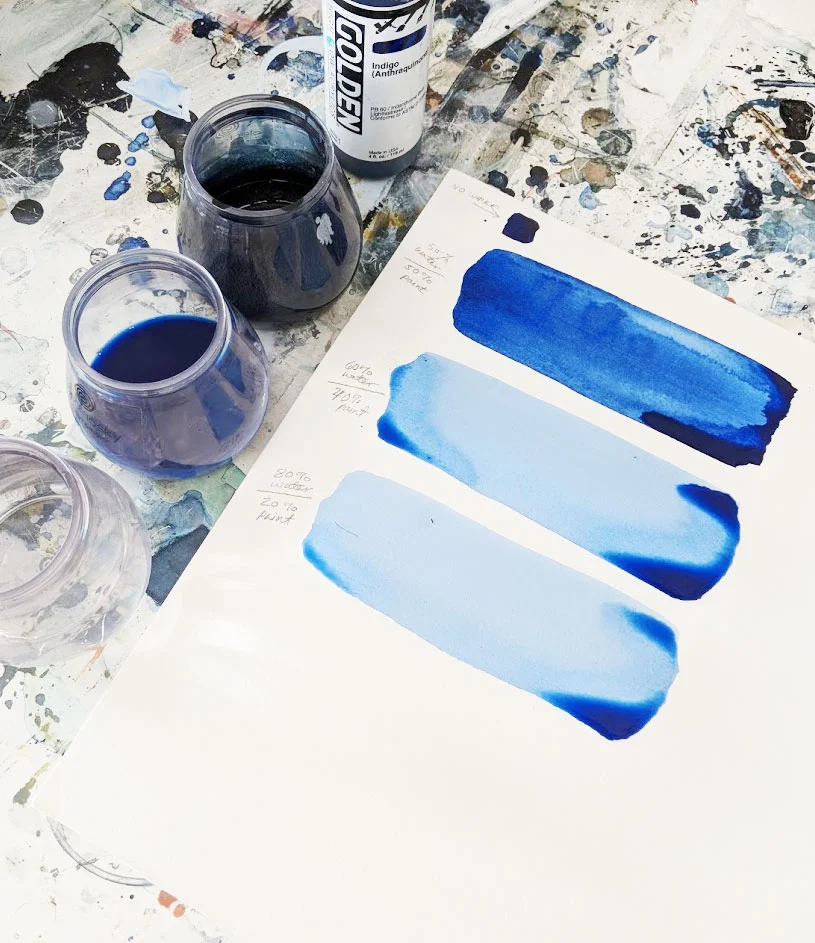
The paints I work with would generally be considered a “wash.” A wash is when you add 60% (or in my case - more) water to the pigment.
On washes:
My washes are generally more than 60% water to pigment.
With water only, experimentation is so important (and fun!). It’s critical to see how the paint reacts to the added water and to the desired surface, as there are so many variables that affect the outcome. (Water + pigment on wood is so, so different from the same water + pigment on canvas.)
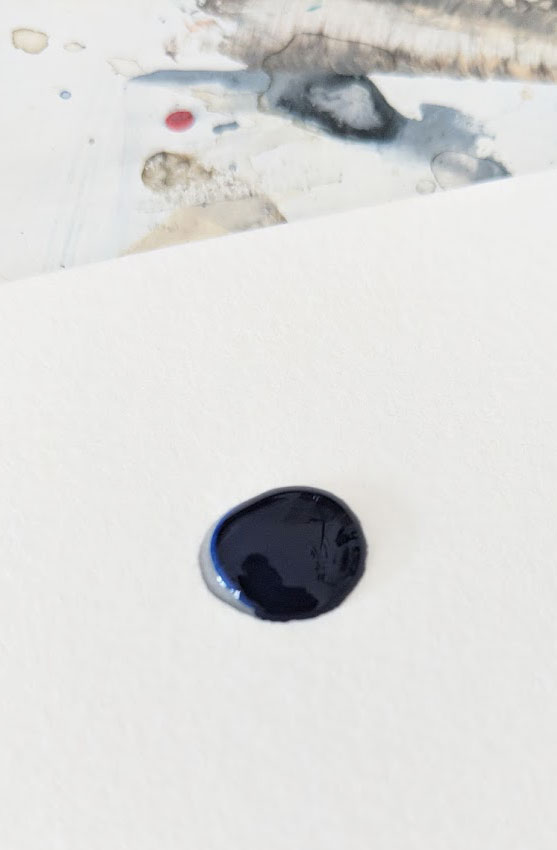
I use golden acrylics and thin with water according to the colors/movement I am aiming to create in the final painting. If a lesser quality of paint is used, no amount of vigorous shaking will force all the particles into the fluid - there will be chunks. I say that as a heads up - it took me a few very sore arms to realize that some paint just wants to be, needs to be solid. I still use these paints but in other situations where their consistency is required.
The top swatch is 50% water with 50% paint. Middle swatch is 60% water to 40% paint. Bottom swatch is 80% water, 20% pigment.
On my process:
I mix these three ratios of paint in three jars. With a jar of clean water on hand, I sketch the forms on the canvas or paper with the lightest wash (80/20). I'll build layers with this until I require a bit more depth and then I switch to the middle hue. When the forms are fully realized and the painting is nearly done, I'll go back in with the 50/50 mix and add the final pools.
On Glazes:
Various mediums can also be added to the paint, creating a “glaze.” Glazes are made when you add 60% (or more) medium to the pigment.
Mediums:
There are a multitude of mediums for every texture/consistency under the sun. I’m just going to cover those that I use to thin paints in this post (but if you have questions about other mediums or molding pastes feel free to ask me, I’ve used multiple brands of everything at this point...)
Glazing fluids have the same adhesion that acrylic paints have, just without the color. When added to acrylic paint they don’t preserve the texture of a brush and can be mixed in without having a significant effect on drying time. To create thin paints without a lot of running colors (mural work, canvases on the easel) glazing fluids are a good bet. Just make sure to read the mixing directions on the bottle as ratios vary by brand.
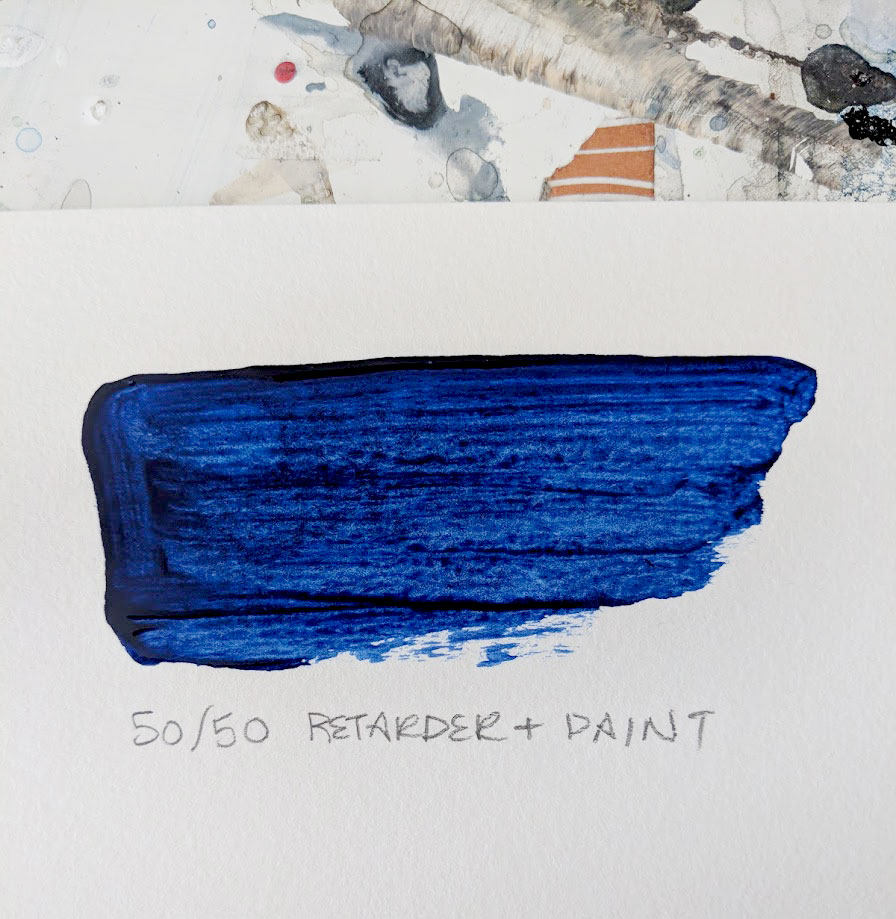
Retarders are used to increase the drying time of acrylic paints. I spent a fair amount of time painting in oils and got very, very used to the slow drying times. Mixing a retarder with acrylics not only thins the paint, but allows for the wet-on-wet techniques that you might find with oils. Be careful when adding retarders to ONLY thin however - as too much will give your painting a drying time of multiple days (or more!). Again - make sure to follow the directions on the bottle, most retarders do not recommend more than a 1:1 ratio.
A Note on drying times:
Acrylic always dries darker, watercolor always dries lighter. When working with thinned paints that rule still holds true. When mixing acrylics with colors before thinning - it’s important to remember that the deeper colors will come through as it dries. The most beautiful pale pink can easily shift to a ruddy rose in a few hours. Again, experimentation is key!
Working with thinned acrylics is all about personal preference and desired outcome…. paint by numbers doesn’t work so well here. Experimentation is the most important thing; finding a pool of paint that resonates in your soul and that you respond to is the key to working with the medium. Don’t panic if it doesn’t happen right away, just keep playing with the paint until your creative soul finds it’s home.
Travel Art Supplies :: Japan/Thailand
I’m an over packer by nature.
As a little kid I would stuff virtually every CD I owned, at least 3 books and as many colored pencils/sketchbooks as would physically fit inside my backpack just to go on relatively short road trips. (Sorry Mom and Dad!)
It’s not that I fear being be bored, or have to be occupied at all times, — I actually really enjoy the feeling of “nothing” to do, I’ve just always felt a supreme need to be prepared. What if the car breaks down in a beautiful field and I want to draw? Better have my pencils. What if rains all day and our hiking plans are cancelled? Better have my sketchbooks.
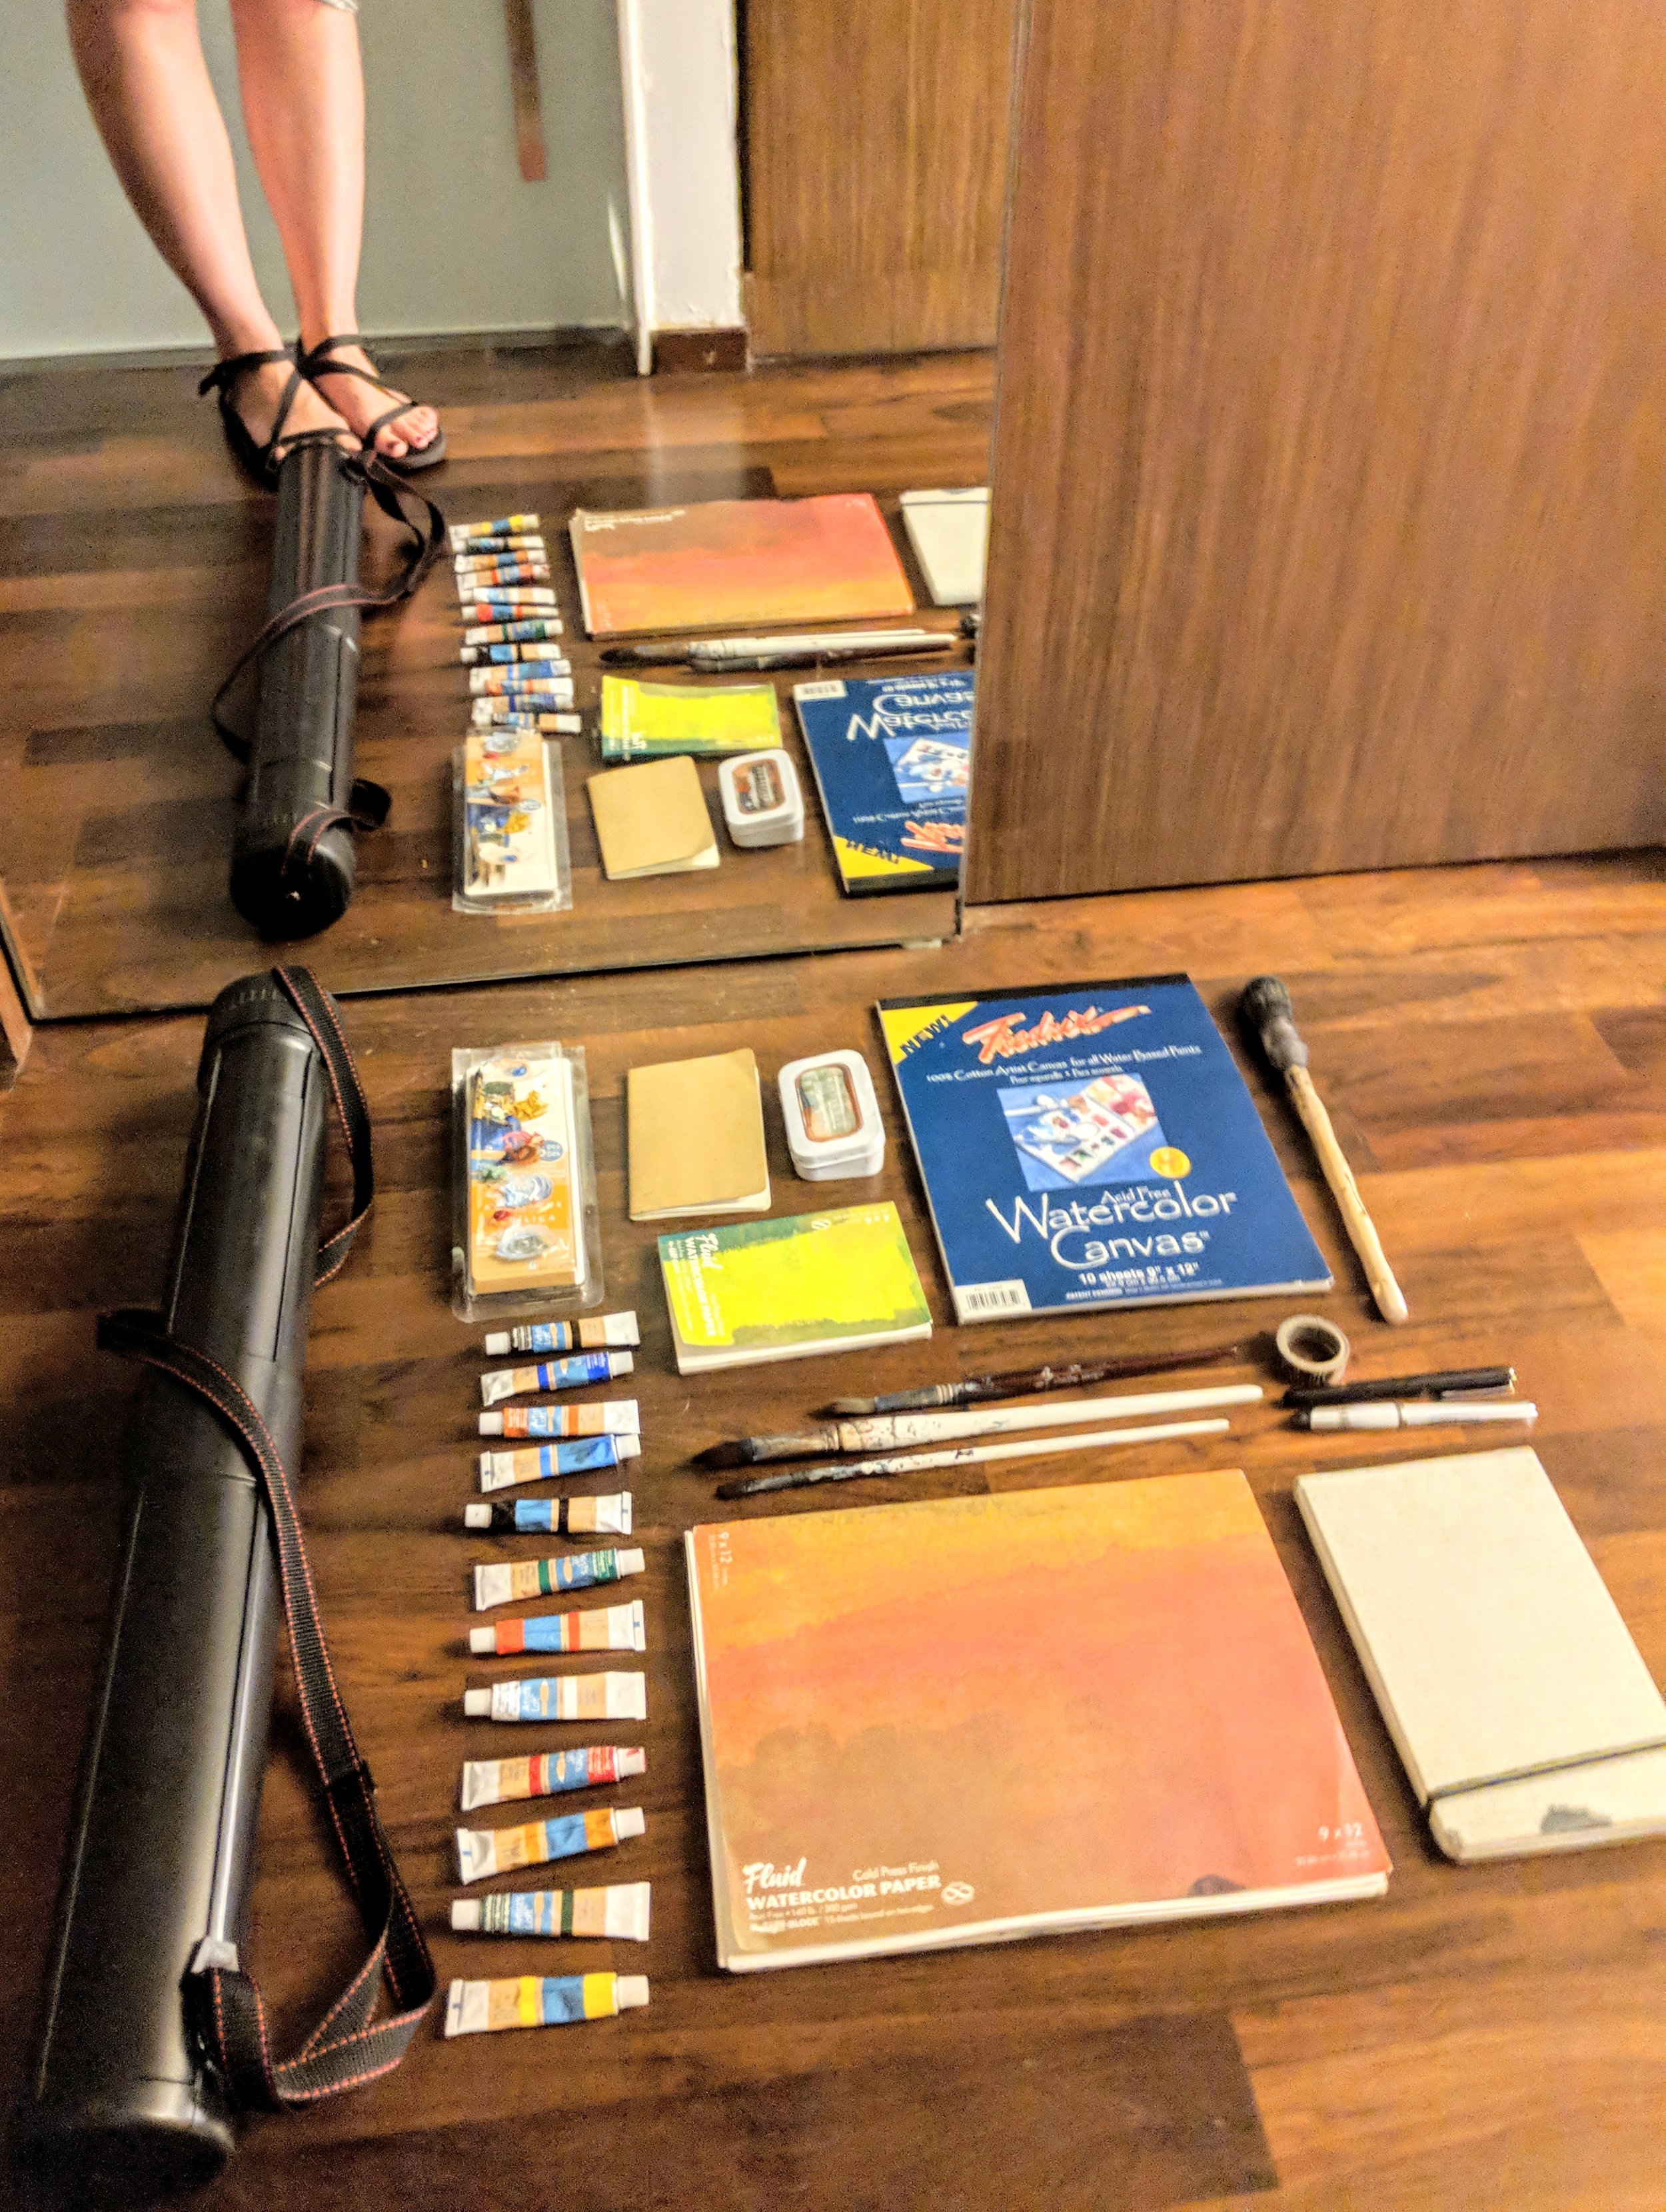
These over-packing tendencies begged to be carried over into my international trips - but baggage requirements and the realistic weight of what I can actually carry have dictated otherwise. Over the last 3 or 4 adventures abroad I’ve whittled down what I consider necessary and have ended up with a pretty good list for creating the art I want to create while away. I’ve been asked a few times on instagram to share what I bring, so here is my complete list of art supplies for this 2017 Asia trip.
Art Supplies - Japan/Thailand 2017
Document tube + a few sheets of paper from home.
Tube acrylics
Acrylic brushes + plastic palette
Passport-sized Moleskine sketchbook (generally kept with my passport)
4 x 6 watercolor book (cold pressed)
Sennelier watercolor travel palette
9 x 12 Fredrix watercolor canvas pad
9 x 12 watercolor block (hot pressed)
Watercolor brushes (Escoda, Golden)
Washi tape
9 x 5 watercolor sketchbook
All of this fits into my carryon backpack except the document tube, which gets carabiner-ed onto my checked luggage. True it doesn’t leave a whole lot of room for non-art items, but with my phone and iPad I’m pretty well set for the flights. At the end of the trip I’m sure re-evaluate what I used the most/least and tweak my list again - but I think out of all the trips we’ve gone in the last 2-3 years, this has been my most successful packing list. What about you, how do you pack for art-inclined vacations?
Problem Solving with Fredrix Pro-Series Dixie Canvas Kit
I love working on commissions. Creativity, problem-solving, getting to speak with clients; the process combines some of my favorite parts of being a working artist. As much as I try to make sure everything is ready, planned and budgeted correctly, as with any long-term project— issues can arise that could possibly derail the progress.
In this case I’m excited to share an issue that came up in the initial planning stage -- which I can happily report is solved.
Staying within a budget for a project is incredibly important to me. I value my clients time and information and do everything I can to make sure the finished version aligns with the initial projected cost. On this project, the canvas was large enough (40 x 60) that it wouldn’t leave a lot wiggle room for the shipping. Well, not any in truth, and thus made the project less than feasible. We didn’t want to break the sketch into two pieces for cheaper shipping, and moving to paper to roll it up wouldn’t work with our sketch either. Feeling really dismayed that I wouldn’t be able to make this project fit in the budget, I tried one last option.
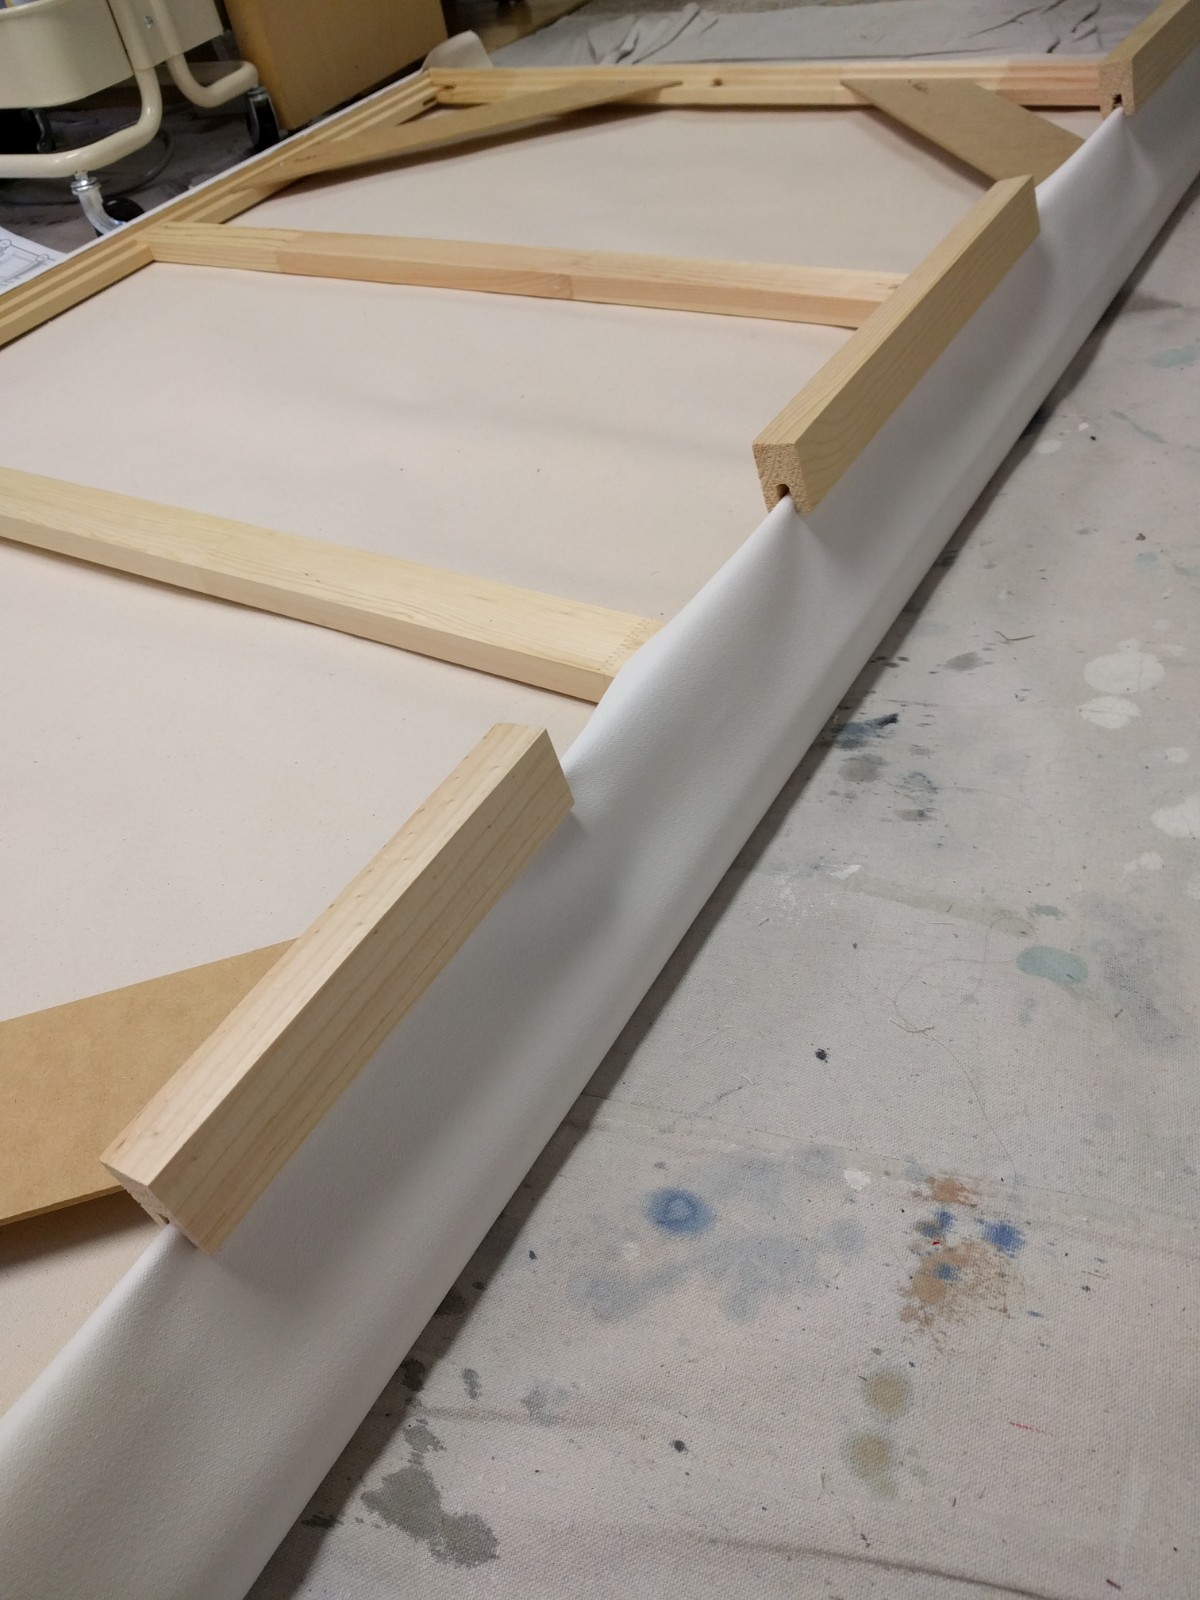
The Fredrix Dixie-Pro rollup canvas kit.
The kit is a rolled, pre-gessoed length (multiple sizes to pick from) of Fredrix’s Dixie Pro canvas. It’s stapled on one side with a sturdy cardboard tube in the middle to support the canvas and is packaged with all the appropriate sized stretcher bars and their patent-pending stretching tool. By using the kit I can stretch it in my studio, paint the work, undo the canvas and repackage in it's original long, thin box to send out. With this arrangement shipping is far, far less of a concern and makes the project 100% feasible.
What I needed:
-Electric drill
-Staples/Staple gun
((Everything else is included in the kit.))
To put it together, I simply unrolled the canvas on my vacuumed studio floor, and aligned the stretcher bars. From there I screwed in the cross pieces at 90 degree angles and added the crossbeams. Once the frame was together I used the provided tool system to stretch the canvas and staple down.
I usually stretch my canvases by hand, or by using a set of metal stretcher clamps --- but I was seriously so impressed with the Fredrix kit stretching system. It was incredibly easy to get a perfect tautness in the canvas, and even easier to staple down. If I was stretching the kit without the disassembly I’d cut the extra canvas off and fold the corners - but since my client will be re-stretching on her end I left the extra.
The canvas was easy to build, and will be just as easy to take apart to save on transit fees. I’m ridiculously thrilled that it solved the shipping problem and made this project possible --- and can’t wait to start the painting phase!
